Showing posts with label DIY. Show all posts

Tuesday, 31 May 2016

Pattern Review: Harlots&Angels Asylum High-Backed Adventurer's Corset

I've had this pattern in my pattern drawer for a while now, but never really came around to making it. I bought it around 2011, together with a hat pattern & kit, because I liked the high back and had always wanted to make a vest corset.
It's a rather modern corset pattern, targeted mostly at Steampunk costumers.

Originally I had wanted to use an asia-style jacquard with butterflies that has been waiting in my fabric boxes for a project to come along for more than 10 years now...but at the moment I quite like wearing shiny non-fabrics like leather or PVC, so I picked a pseudo-snakeskin-patent-leather to work with. For lining and strenght, I chose a plain cotton coutil and doubled the patent leather with cotton drill. I still had some buckles salvaged from an old pair of boots (never throw anything away!) and only had to order some more steel.

And of course, this was another project for WGT.


Instructions:
The design and layout of the pattern and instructions are not well done at all. All illustrations are drawn by hand and not always clear, especially when it comes to the part how the boning channels are constructed. Some printed instructions are cut off by the layout so that only the upper half of the line is printed, which makes it unreadable. At some points this has been corrected by hand - quite sloppy.

There is no clear indication about how much sewing allowance is included. Apparently, for most seams it is 2cm, for some others 1.5cm or 0.5cm. For me, that makes the whole process quite error-prone.


Construction:
If following the instructions, the corset busk is sewn in in a way I've never seen before using button holes - I preferred to stick to my usual method. However, I've heard from others that this method works well.  Actually I did that for most part of the corset: I just stuck to my usual corset construction method to put everything together.
What was very annoying was that some pattern pieces don't match up. One of the two pieces is simply longer and there are no notches or any other markers on the seamlines to indicate how the pieces are supposed to fit together.
I also made some modifications on the straps: the part facing the neckline was supposed to be hemmed with bias tape. I preferred to sew upper fabric and lining together and turn them inside out.


Fit:
The fit of the bottom half, the actual corset, is okay for me, but I wonder if the upper part was designed for a Valkyrie or professional swimmers (mind you, with a 50cm waist). The shoulders were around 10cm too wide for me and I had to cut away a lot, the back parts were way too long and probably designed for someone at least 1,75 tall.
The way it is cut is not designed for much waist reduction, the way it is curved it will probably exert a lot of pressure on the lower ribs as well - not really comfortable.

All in all, I'm not sure if the pattern saved me much time. I had to modify so much, I might have just as well taken one of my existing corset patterns and extended it at the back. I definitely cannot recommend this pattern, especially not for beginners who do not know how to adapt a pattern to fit well. Harlots and Angels seems to have quite a wide range of patterns and for that I would have expected a much more professional product. I am aware that creating a pattern in a range of sizes takes a lot of work - but I've sewn patterns from non-professionals that were of a much higher quality.


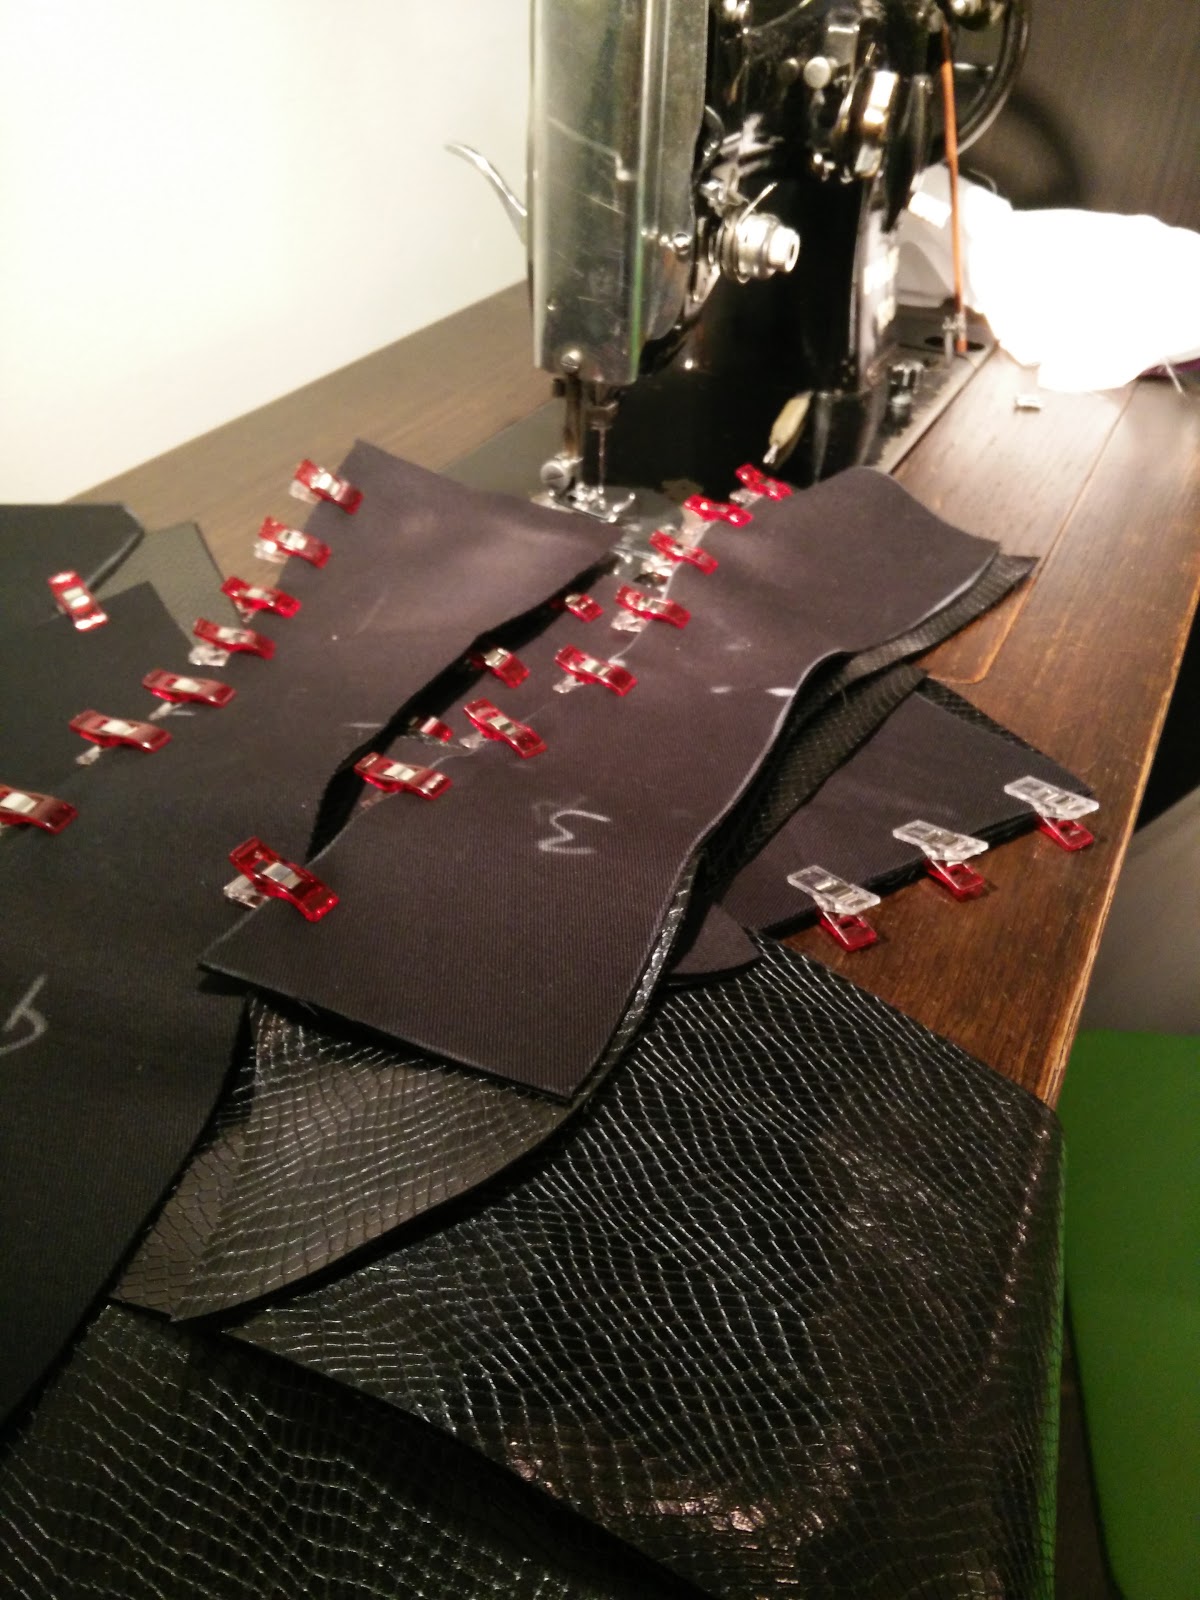
However, I do like my result. The patent leather I used is notoriously tricky to work with, as you can't really use pins or undo seams without leaving behind holes in the fabric. I mostly used Wonder Clips for keeping the fabric together, that worked quite well. But the material behaved very nicely, and the corset turned out very neat and, once I had modified the pattern, very well-fitting. On the mannequin there's quite a lot of wrinkling in the fashion fabric, on myself it's not as bad.
I am especially proud of how neat the bias tape turned out, barely any seams are visible :)
At WGT, with a Halo and a fishtail skirt I made ages ago. The outfit was intended to be completely different, but the cold weather completely crossed my plans.

Monday, 30 May 2016

Sewing for WGT: The Knipmode Corset

The previously posted neck corset was of course part of a larger outfit I made for Wave Gotik Treffen this year. I had been itching to finally make another corset (not that I have much opportunity lately to wear one...) ever since I had ordered engraved corset busks from Vanyanis in Australia.


The Dutch sewing magazine Knipmode had in its November 2015 issue a corset pattern with hip gores that I really wanted to try out. The pattern was part of the collection of the winning team of the dutch version of The Great British Sewing Bee (or something along these lines, if I understood it correctly) and all of the designs, most of them using patent leather and black fabrics, went straight into my To-Sew-List.
The corset pattern is an overbust corset and I had only made 2 of those so far, and both of them weren't exactly a success when it came to fitting: the first one turned out too small around the bust, the second one had way too much space, requiring me to add A LOT of padding thus giving me monster-boobs.

First step: make a mock-up. And just as expected, even though I cut the smallest size, the mock-up turned out way too big, especially at the waist. I guess because the pattern is targeted at a fairly mainstream audience, you can't really intend it for tightlacing anyway. And since the dutch sizes tend to run bigger than usual sizes (what with dutch girls being generelly quite tall and broad-shouldered), the size 34 came with a 62 cm waist. My natural waist is 64cm, so I ended up taking away around 10cm around the waist. I also added some length to the bust, so I could change the upper edge into a slightly more dramatic shape.


Since I didn't want any external boning channels like the corset in the magazine had, I constructed the corset in my usual manner and sewed the boning channels to the inside of the coutil lining. I prepared the upper layer from silk fused to a strong cotton fabric, and then inserted the busk:

Next, I topstitched along all of the seams on the outer layer, to connect it with the coutil lining. And then the trouble started. When I had

I don't know what happened - probably my seams weren't exact enough, my changes in the pattern introduced some errors, I maybe didn't cut the fabric exact enough. I don't know. But the corset had so many bumps and wrinkles when I first put it on, that I suffered from a minor nervous breakdown. So I left it for several days in the corner where I had thrown it and did something else.

This is not how it's supposed to look like.
Eventually, I unpicked some of the topstitching, carefully repinned everything, and could eliminate at least some of the wrinkles. I had planned a lace overlay for the corset anyway, so some of my errors are less obvious now that they're covered with lace.


The lace overlay took some work in arranging and careful symmetrical pinning to the corset. And of course, lots of handsewing.


About the pattern and instructions:
The instructions in the magazine are very detailed, with recommendations for material and clear illustrations about what you're supposed to do. I didn't really follow them, but I probably should have at least read them a little more thoroughly (the recommendation to *first* sew in the hip gore parts, *then* close the side seams would have made my life a lot easier, I think).
My one issue with this pattern is with the fit: It really runs quite big and does not give such a nice shape in its original state. I like corsets with hip gores as they tend to have a rather large hip spring, but if there is no reduction whatsoever around the waist, the whole affair resembles more a barrel-shape than the hourglass you want to have.
The bust area, however, fits really well. I did add some foam cups inside to give me a nicer cleavage.
I think I could still have taken away more width from the corset, at the moment I can easily close it fully and it could really fit a little more snugly.


Sadly, WGT this year was so horribly cold, that I could only wear my outfit without a jacket for the 2 minutes it took to take this picture. I'm wearing it with a skirt I made a couple of years ago, and a headdress I made for Castlefest last year.
I may still embroider some beads or flowers onto the lace to give it some more bling - but without any opportunities to wear it coming up, I don't have any pressure for this...
Eventually I also want to make a matching skirt - I still have plenty of silk and lace here. I might have managed to throw something together before the festival, but with such a beautiful and expensive material, I really didn't want to risk another disaster :)

Tuesday, 19 April 2016

Pattern Review: Neck Corset by Ralph Pink

Wave Gotik Treffen is coming up and I need something new and pretty to wear! I have 2 outfits planned, both of them with a corset, and while waiting for supplies to arrive I spontaneously added a matching neck corset to one of the outfits.
I had expected having to draft my own pattern but when googling for instructions I quickly came across this pattern by Ralph Pink. Buying, downloading and printing it took me barely 10 minutes.

The PDF instructions describe in detail how to set up your printer to print the pattern in the correct size, as well as how to cut the pattern pieces. An introduction to all sewing techniques you would need is also included and all steps are illustrated with very clear computer drawings.
The instructions require you to cut 3 sets of pattern pieces: 2 sets out of the strength layer (coutil), 1 set out of the fashion fabric.
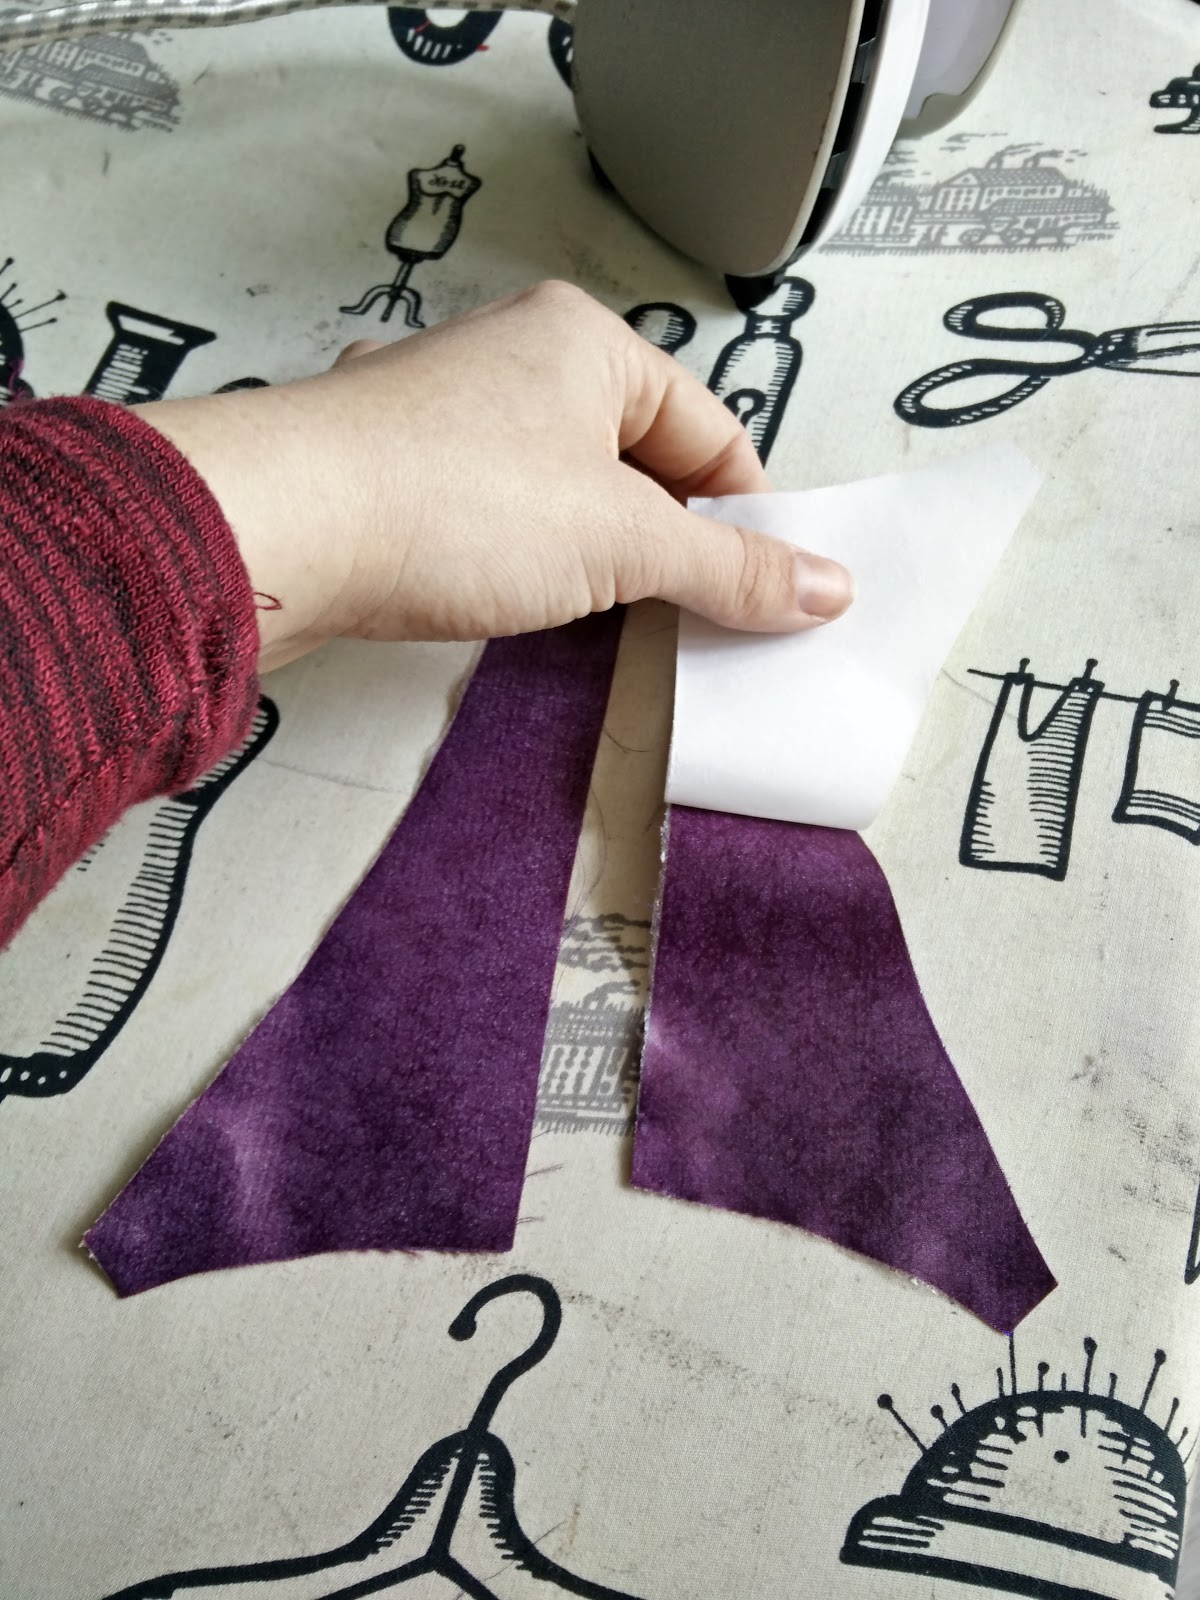
According to the instructions the fashion fabric should then be padstitched onto one set of the strength layer pieces - but as padstitching is a lot of work and I cannot really imagine doing it with a fabric as thin as silk taffeta, I reverted to my usual method of joining fabric layers for corsets: I used Vliesofix, which is a sort of double-sided fusible interfacing usually used for appliqués. It comes mounted on paper and is first ironed onto the fabric, then the paper is removed and leaves behind an adhesive layer on the fabric. With this adhesive layer the fabric can then be ironed onto another fabric.
Fashion fabric after I had ironed on some of the Vliesofix parts.

When you remove the paper, a rubber-like layer stays behind on the fabric
Prepared pattern pieces.


The pattern has only 0.5cm seam allowance included, which I personally find a little fiddly to work with, but as I was too lazy to add additional seam allowance that was what I worked with.


First look after I had joined the individual layers
The boning channels are marked clearly on the pattern and are sewn through all of the layers, although to me it seems like a lot of bones for such a small garment that will never be subject to any tightlacing. 15 bones! I have some regular corsets that do not have that much boning! It does give a nice look though and the bones help in maintaining the shape. I'll have to see how comfortable that is when wearing it for a longer time.

Complete with boning channels

Next, to match the corset I was going to make, I handstitched lace to the corset.


And finally I finished everything off with bias binding, added the grommets and laced it up.


You can maybe see in the pictures that it turned out a little too high around the neck - I hope that won't give me any sores in the long run and I also hope that the boning in the front maybe bends a little more over time, so that it gets more comfortable.

All in all, I can only recommend this sewing pattern. The shape is a little more unusual than most neck corsets I found online and can be adapted for a variety of designs. I found pictures of some versions in leather that also looked very good.
With a price of 9€ some people may consider it to be a bit on the pricy side for such a small project. I still think it was worth it - I really like the way it turned out and it did save me some time for pattern drafting and having to think about construction myself.

Next up: the matching overbust corset. Stay tuned...

Saturday, 5 September 2015

London Calling - The Cumberbitch Dress

In the beginning, there was a First-World-Problem


and a piece of fabric from the Lapjesmarkt.

Fortunately, the internet is a seemingly bottomless resource for free sewing patterns, and while looking for more vintage fashion patterns in the style of the dresses in Masters of Sex (as I wrote earlier - my new addiction, thanks to my friend Rebecca), I found this awesome blog with lots of free 30s-50s inspired sewing patterns. Among them was a this cute 1950s inspired cocktail dress that was a perfect fit for the coupon of fabric I had picked up on the fabric market some weeks ago.

The pattern itself was around 1 size too large for me, this time I adjusted the size directly on the cut fabric pieces (I like to live dangerously!), which worked out quite well, although I feel that I could have taken it in a little more. The pattern is very well explained with an A4 page of instructions. Almost too much for my taste, since I daresay I know my stuff and I'm too impatient to read longer texts, but it will probably be a great help for less proficient (and less impatient) seamstresses.


Please note the pattern matching in the front and in the back - the zipper in the back spoiled my efforts a little, but if you don't look too closely it's okay I guess.

Overall cost: 1€ for the fabric, 2€ for the zipper.

In the end, things worked out a little differently than planned: We arrived in London on saturday morning and were greeted by sunshine and warm weather, so we spent the afternoon in Camden town, which was rather busy, given that it was holiday season and a weekend.
Mad Tea party in Camden

Camden Lock

 Canals, boats, biertje - we instantly felt at home. Shopping on the famous Camden Market however wasnt much fun, the exchange rate for the British Pound isn't exactly favourable at the moment. Towards the evening, we met up with our friends and then went for dinner somewhere near our hotel. Followed by another beer, in a pub nearby. Once we had settled down with our drinks at a table, who walks in? 
None other than Benedict Cumberbatch.
I'm proud, we girls were well-behaved and did not jump into full fangirl-mode, let the guy have his after-show pint and just found it incredibly cool to breathe the same air ;) After all, we would see him on stage on Monday evening.

One of the few sunny spells - Walkie-Talkie, Tower Bridge and The Shard

The rest of our stay in London was completely rainy, so we spent most of the time in Museums. I went to see the Shoes - Pleasure and Pain Exhibition in the V&A and now would like a copy of the high-heeled victorian leather boots they had on display *sigh* We also went to the Science Museum (always worth a visit, even if its just for seeing Charles Babbage's brain floating in a jar) and to the Tate Modern.

No pictures allowed inside :(

Mandatory book haul at Waterstones Piccadilly Circus
All in all I have to say, living in Amsterdam really spoils other cities for you. London seemed dirty, loud and noisy in comparison, and not exactly pretty either, with its inhomogeneous architecture (Old church next to steel-and-glass-skyscraper next to ugly 1960s concrete block...) and so much traffic. My last visits to London always gave me this adrenaline rush of finally being in a metropolis again, but now that I'm living in the prettiest capital of them all, I just don't feel it anymore.

And to conclude this post: Hamlet was simply divine! Probably my favorite theatre moment so far: the whole cast was amazing (after all, the Royal Shakespeare Company should know their stuff), the stage design placed the story in a hauntingly beautiful castle, and even the Shakespeare-novice and theatre-agnostic in our midst was well-entertained. I have to admit, I cannot really judge the quality of the production itself, since it has been more than 10 years since I thoroughly read Hamlet, but that may be for the better (I tend to over-criticize).

Super-bad interval selfie with champagne!


Friday, 21 August 2015

Back to 1951

A while ago I went on a nightly ebay-spree and ended up buying several vintage sewing magazines. I originally had started out looking mostly for 1940s magazines, inspired by the amazing kick-ass tv series Agent Carter, but soon saw that there were barely any magazines around from that decade. It does not pay any compliments to my intellect that it took me a while to figure out why so few German fashion magazines from the 1940s were up on German Ebay - yup, I guess at that time German women had more pressing worries than how fashionable they were.
The magazines I bought were a Vobach magazine from 1936, where the patterns turned out to be rather underwhelming, and Beyer's Mode für Alle from 1951, with several dresses that immediately caught my eye.


For the beginning, I picked out the blue cocktail dress shown on the right side - it's supposed to be embroidered with pearls and sequins, but I'll probably leave it plain. The pattern sheet containing the pattern pieces turned out to be quite a challenge. With more than 100 different pattern pieces on each side and everything printed in black, the sheet might as well have contained the strategy plan for the Russian invasion and it took a lot of patience and good lighting to locate and trace the pattern pieces that I needed.
So, time for a mock-up. Other than modern patterns, vintage sewing magazines contained only a single size for each garment. Having to scale everything up or down is more work, but then again 

First mock-up: Definitely too large. Not exactly flattering for Ada, my mannequin.

Cut everything up, re-sewed: yup, a lot better. The skirt will have to be shortened though.

My favorite stall on the monday-morning fabric market provided me with some black-on-black polkadot fabric, for the affordable price of 8€ for 4 meters. A rainy sunday afternoon and some binge-watching of Masters of Sex (my new addiction - a tv series around the Masters-Johnsson research, set in the 50s and 60s...) gave me the best motivation to start working and I needed around 6 episodes to bring the dress to its current state:


It's still too long, but I guess I'll need an occasion to actually wear it as a motivation to do the hem. It's a full circle skirt with around 6m circumference, and as hemming isn't exactly my favorite activity, I'm putting it off until I absolutely have to do it :)
And I might need a petticoat to wear it with...

All in all material cost so far: 8€ for the fabric, and I still had the zipper.

Tuesday, 13 January 2015

Back on track!

Just before christmas, when I was actually supposed to start studying for my exams, I finally got my sewing mojo back.

Having left part of my fabric stash, most of my sewing patterns and my beloved mannequin back in Germany, I instead picked a download pattern for an easy dress from Burdastyle.....which is something I'm not going to do again so soon:
More than 60 pages of printout, 30 minutes of frantic cutting paper edges and glueing pattern pieces and cutting out the pattern, while some of the contained pattern pieces weren't even needed for this version of the dress, but only for a variation of it - for which the instructions were of course NOT contained in my download.

Lots of dead trees


Ironically, the dress I had picked was contained in the current Burdastyle magazine - since the Dutch version contains the same patterns as the German one, I could have spared myself a lot of crawling around on the floor with glue and scissors, by a 2-minute-trip to Albert Heijn around the corner.
Anyway, enough ranting, while the fabric wasn't the nicest jersey to work with, and the pattern itself isn't that spectacular, I'm happy. Comfortable work-proof cold-weather-dress.

Some days later I came across a really nice sewing blog, petit-main-sauvage, featuring a lot of simple but pretty patterns and tutorials for pattern drafting and alterations. Some of them immediately went onto my to-sew-list, for example this dress:


I bought the fabrics last year on the Dutch fabric market that is touring through Germany, and the blog mentioned above is actually a Dutch blog - a rather fitting project for my start here in Amsterdam :)
A new favorite in my wardrobe, I think!

Next on the sewing agenda: My dress for the Gala Nocturna! I have a plan A and plan B, let's see which one wins...
Now that all my boxes, patterns, costuming books, and my mannequin Ada are finally here, I'm a little more enthusiastic as well.

Sunday, 28 September 2014

Wenn du vom Stricken sprichst, ist das so schön...

Having left my trusty sewing machine behind in Germany, my fingers began itching to MAKE something soon after I arrived in Amsterdam and I urgently needed some craft project to occupy myself. Sewing by hand was not an option, as I simply lack the patience for that and I would still have needed too much equipment.

Well, knitting it was then - I did know at least the basics, although so far I had only been able to knit socks (which I had actually been taught over the phone) and didn't know any terminology for anything I'd been doing, let alone was able to read knitting patterns. And there's only so many socks that I need anyway, time to expand my knowledge!

Off to the nearest yarn store I went, which was was in this case Penelope's Craft Boutique, where the friendly owner recommended a pattern for beginners like me and helped me pick the right needles and yarn for it.
I ended up with the Herbivore Shawl by Stephen West, who is apparently quite known in the knitting-scene and is living here in Amsterdam, and some Madelinetosh Light Merino in the colour "Flashdance" (why, of course I'm doing my experimental first real knitting project with an expensive yarn! *rolleyes*)

In the beginning there was a lot of cursing, unravelling und tutorial-video-watching involved, until I had gotten the hang of it and was able to knit away happily and frustration-free. Also, thanks again to my friend Nadja, who was there to help me in my initial confusion over knitting, purling and back loops!


All in all it took me around 2 weeks to finish, mostly while binge-watching Veronica Mars. Once finished, I first attributed it to my lack in skills and experience that it did not look as smooth and even as the sample piece in the shop - until a wise person told me, that it still needed to be blocked. For those who are as unfamiliar with the term blocking as I was until a few days ago: This involves gently washing the knitted piece, then stretching and fixing it into the desired form and letting it dry over night.

Considering how windy it is here and that university is a 20 minute bike ride away, this probably won't be the last scarf/shawl/cowl I've knitted. At the moment I'm still putting off buying yarn for new projects until we've somewhat finished picking/assembling/arranging furniture and unpacking boxes in our new appartment, but as soon as we're settled I'll probably start hoarding wool and producing one garment after the other. While sewing will always remain my No1 crafting activity, knitting is a nice way to make something without having to mess up the whole apartment.